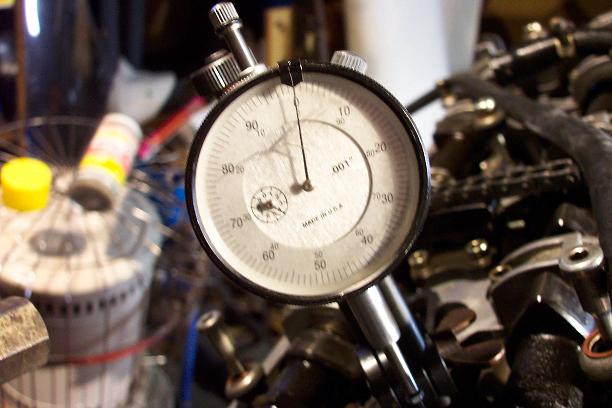
Once the cam gears and timing belt have been installed, following proper tensioning the of the timing belt, it's time to set the precise timing of the valves. This is done with a precision gauge:
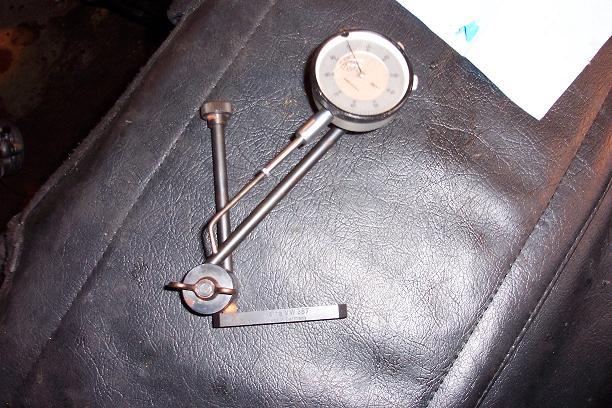
For cylinders 1-4 on the passenger side (US model) of the engine, the gauge is mounted on either of the intake lifters of cylinder 1, the frontmost cylinder
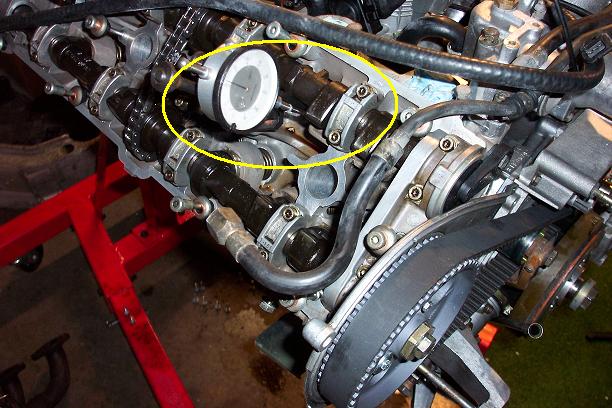
Make sure that the bottom of the gauge is off to the side of the lifter so that the lobe on the camshaft does not hit it when the cam turns.
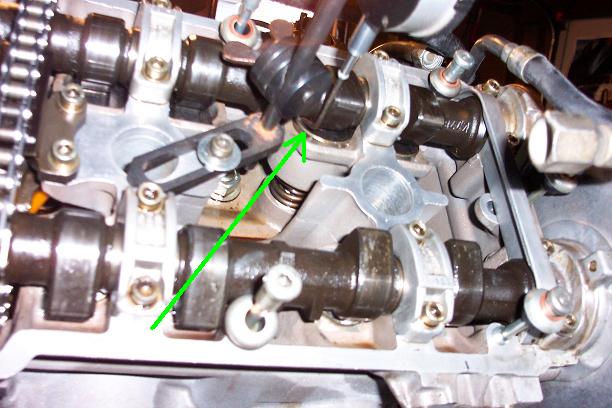
Because the guage measures the distance that the lifter is depressed (the needle on the guage goes DOWN to measure, not UP), make sure that the needle is pre-loaded by 5mm. In other words, the guage needs to be installed so that the needle is being pushed up at least 5mm. Otherwise, there won't be enough room for the needle to travel down far enough to measure the depression of the lifter.
Turn the crank to 0 degrees TDC (top dead center).
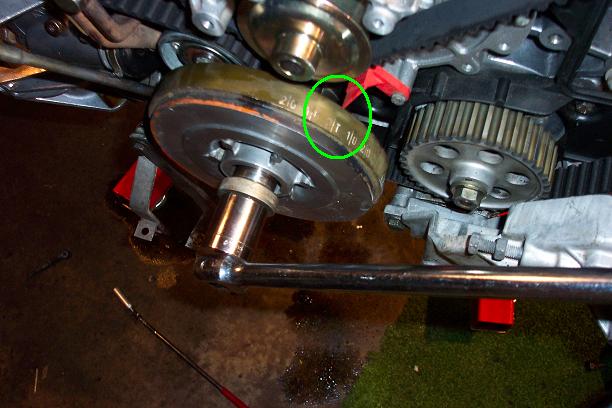
The next part is a little confusing. To measure the valve timing on cylinders 1-4, rotate the engine 360 back to 0 degrees TDC. At this point, the cams have made 1/2 turn (since the cams make one full rotation for every two full rotations of the crank). After one rotation of the crank, set the gauge for cylinder 1 to 1.6 +/- .1 mm. Since my guage was set for fractions of inches instead of millimeters, the setting was 0.063" +/- 0.004"
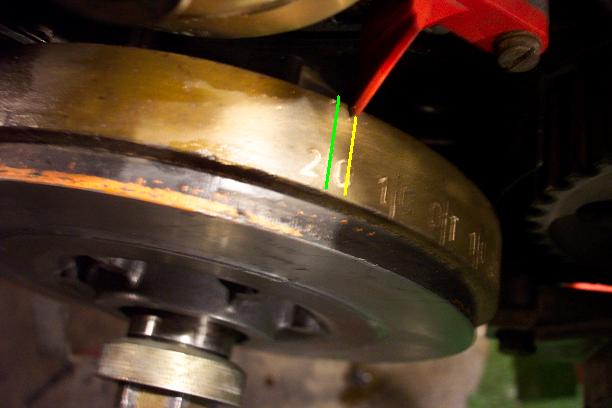
With the guage set to 1.6mm +/- 0.1 mm (or 0.063" +/1 0.004" for SAE guages), slowly rotate the crank toward 20 degrees AFTER TDC (in the direction of normal engine rotation). If valve timing is already correct, when the crank reaches 20 degrees after TDC, the guage will read 0. If not, you need to adjust the valve timing. NOTE: For model years 87+, the setting for the guage is 1.8mm +/- 0.1mm (or 0.071" +/- 0.004")
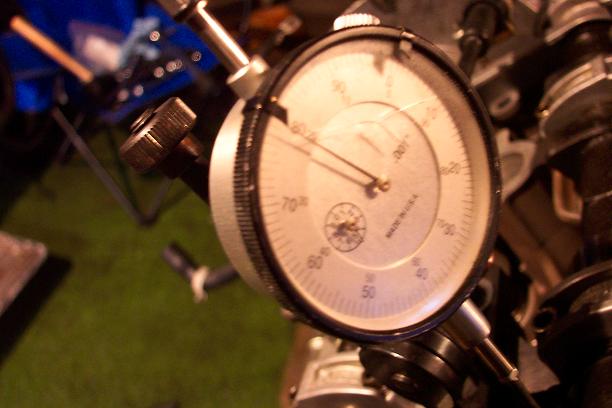
Here you can see that with the gauge at 0, the crank was not at 20 degrees after TDC. I needed to adjust the valve timing.
To adjust timing, first lock down the cams to the backing plate for the rotors using short 5mm bolts. I used washers since my bolts were a little too long.
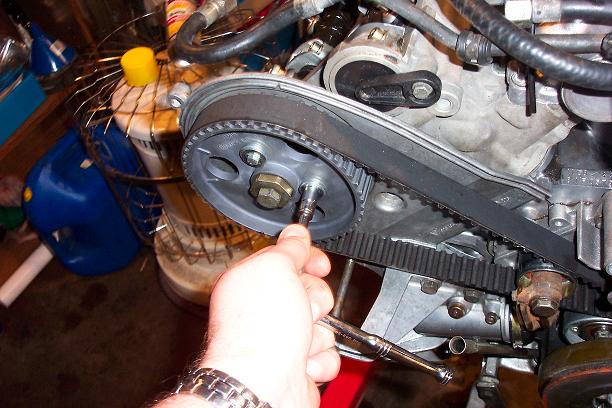
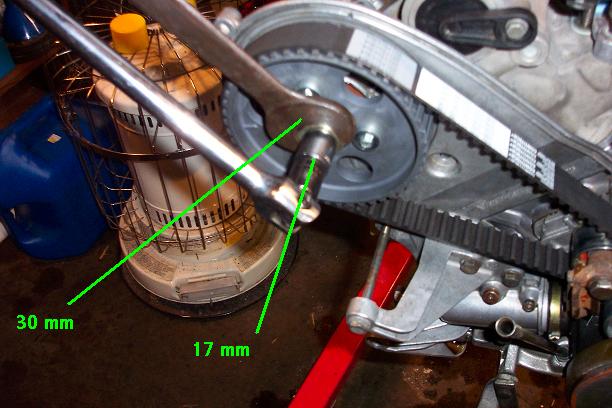
Once the 5mm bolts have secured the cams to the rotor plates (which are behind the cams), loosen the cam gear bolts (17mm) while counter-holding the 30mm washer.
Rotate the crank several times and keep re-checking the gauge to make sure that you are getting consistent readings. The gauge is VERY sensitive, and you may find that the crank doesn't move with complete smoothness. Take your time and be careful to apply even pressure while turning the crank so it doesn't jump past 20 degrees after TDC where you want to re-check the gauge. The gauge should be checked whenever the cam gear is 180 degrees of its full rotation (full rotation being whenever the marks on the cams match the marks on the rear timing belt cover plate).
Once you've confirmed that you get consistent readings of 0 on the gauge when the crank is near 20 degrees after TDC, loosen the 5mm bolts that are holding the cam gears to the rotor backing plates.

With the 5mm bolts loose, GENTLY move the crank to EXACTLY 20 degrees after TDC. In order to make turning the crank easier, I used a long socket wrench with a cheater bar. Together they made the wrench nearly 3 feet long. This made turning the crank smoothly much easier.
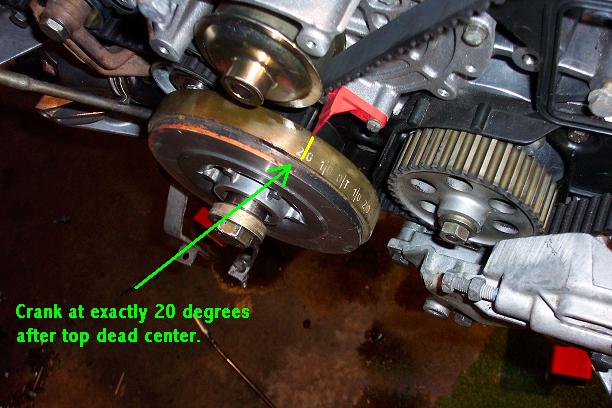
Tighten the 5mm bolts again, and rotate the crank several times to make sure that the gauge now consistently reads at 0 when the crank is at 20 degrees after TDC (again, for cylinder 1 the cam will be 180 degrees removed from true TDC). If the gauge consistently returns to 0 whenever the crank is at 20 degrees after TDC, valve timing is accurate.
Tighten the cam bolts to 65 Nm (47 foot lbs) while counter-holding the 30mm washer.
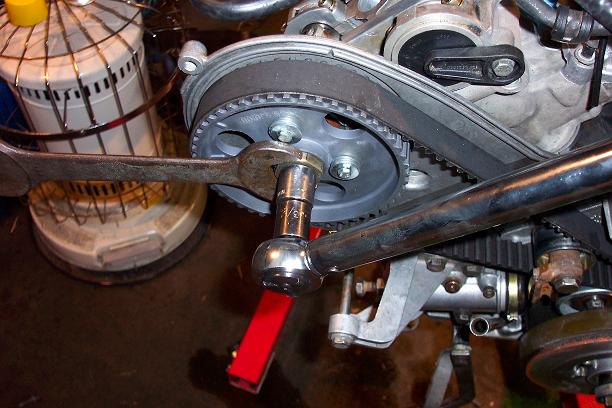
Remove the 5mm bolts. Precision valve timing for cylinders 1-4 is done!
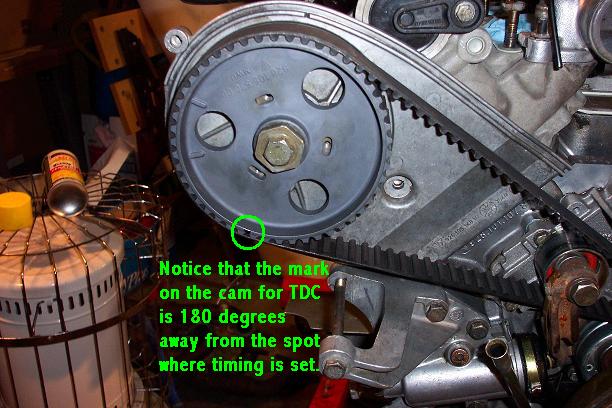
To set timing for cylinders 5-8, use the same procedure. However, the gauge should be set to measure 2.0mm +/- 0.1mm (or 0.079" +/- 0.004" for an SAE gauge). Also, valve timing on cylinders 5-8 is checked on the intake lifters of cylinder 6 when BOTH the cam gear AND the crank are at 0 degrees TDC (instead of having the cam gear 180 degrees off). Here's where the gauge should be mounted on cylinder 6:
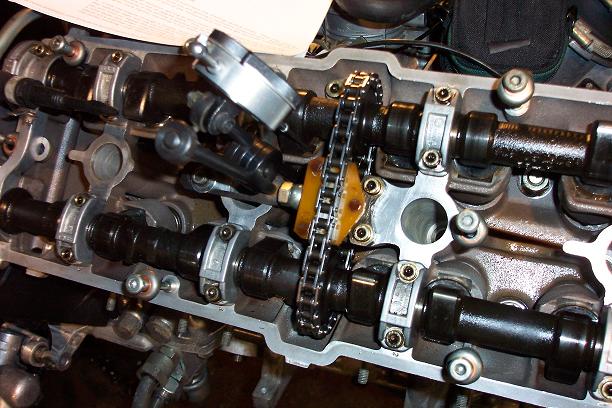
Here's a picture of the gauge set for 0.079", ready to move to 0.00" when the crank is moved to 20 degrees after TDC:
Congratulations! You're done!