Part of the fun, and much of the expense, in this project relates to all those things that should be done "while you're at it." In other words, since the engine is already out, many things should be done so you can try to avoid having to pull the engine again in the future, or because certain things are just easier to do with the engine out of the car.
Before the timing belt failure, I noticed that I was getting hot air coming through the center console where the gear selecter lever is located. If the windows were down and the sunroof was open, the flow of hot air was worse, and the whole center console would begin to heat up. This, along with the fact that the engine did not rock in place when it was revved, is a classic sign that the two rubber motor mounts supporting the engine had collapsed. With the engine sitting lower, a gap existed between the torque tube and the insulation of the firewall, allowing hot air from the engine compartment to be sucked into the passenger compartment. This made driving in hot weather uncomfortable, especially since my air conditioning didn't work (yet another while-you're-at-it project).
Here's where the hot air gets in:
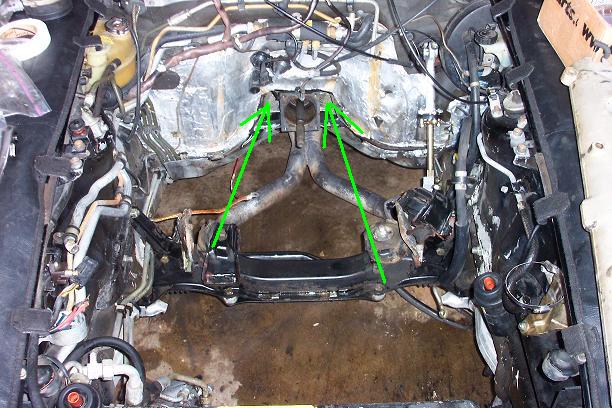
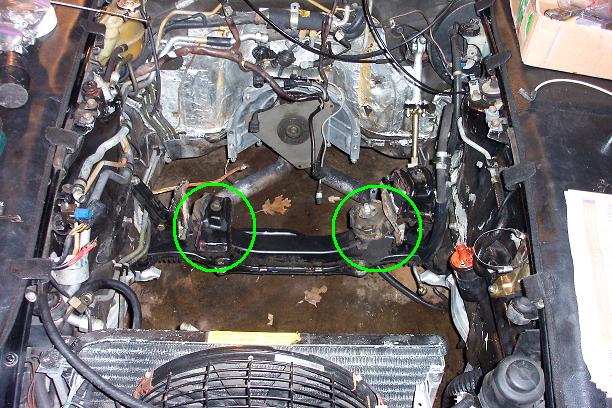
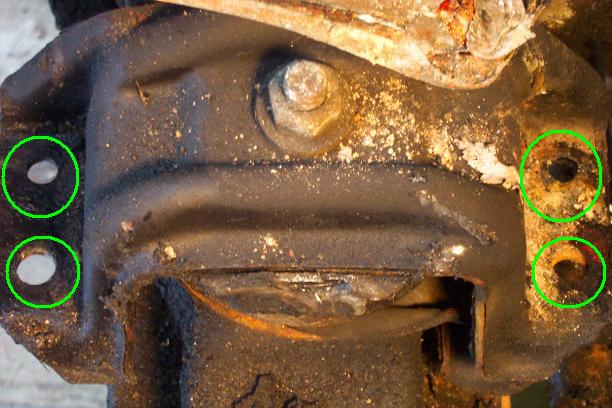
Here's a picture of the location of the motor mounts. The plate covering the mounts is secured to the bottom of the engine by a 13mm and 17mm bolts. The cover is gone in this picture on the right mount. What remains are the top and bottom motor mount bolts which are 19mm.
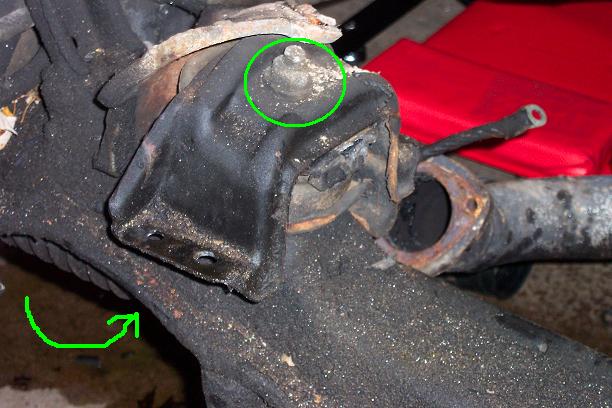
The upper nuts were not difficult to remove using a cheater bar (the top half of the bar on my car jack. In this close-up, the top nut is circled, and the arrow points to the location of the bottom nut. Unfortunately, to get at the bottom nut, you neet to lower the steering rack, which itself requires the removal of the steering rack cover plate.
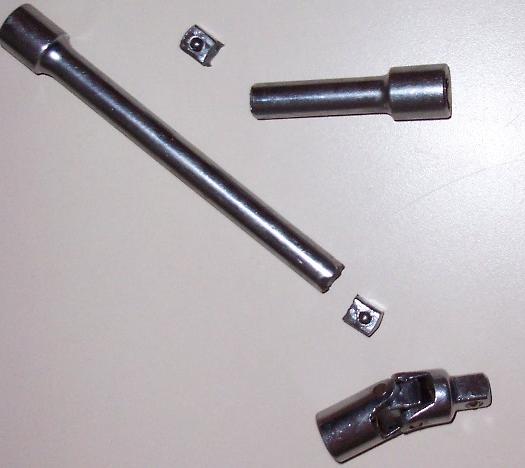
The bottom nut on the driver's side motor mount was REALLY tight. I managed to destroy 2 socket extensions and a flexible joint. If you look closely, you can see the flexible joint is bent in middle. I finally got the nut off with brute force and some PB Blaster (a penetrating catalyst).
Here I've circled the location where the 13mm and 17mm bolts attach the motor mount cover plate to the engine block.
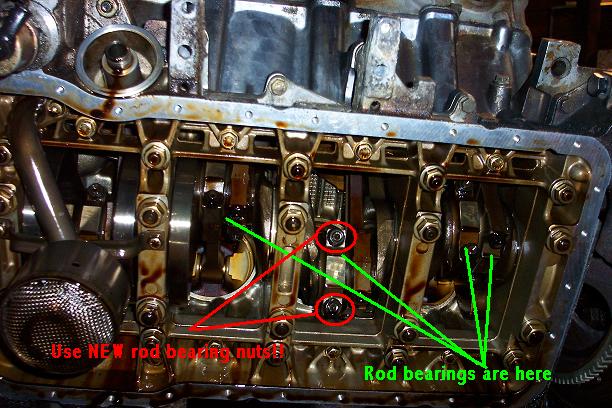
The next "while-you're-at-it" project was to replace the connector rod bearings. These are accessible pretty much only with the engine out of the car. With 117,000 miles on the car, it was a safe bet that they had some wear, so I ordered the bearings (Glyco bearings are OEM) along with new rod nuts (important) and changed the bearings. Here's a picture of where they are located. There are 16 bearings, 2 for each rod.
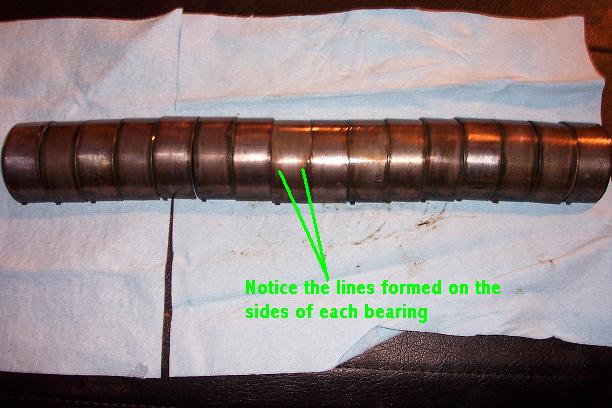
As I pulled the old bearings out, I lined them up according to their location. When new, bearings are light grey. When they have wear on them, they will begin to expose copper coloring. The bearings look to have a copper tint here, but that's because of the oil stains. Under normal light, they didn't show any copper tint. You can, however, see dark lines on the edges showing wear on them.
Here's another picture of the bearings, showing the surfaces that were in contact with the crank:
The rod bearing nuts should be torqued to 55 ft. lbs.